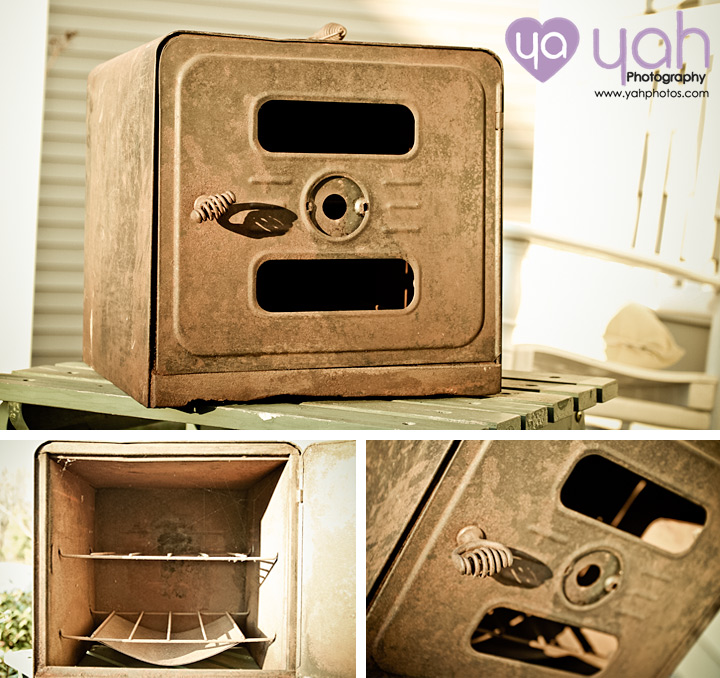
So excited for what we uncovered at The Depot this past weekend! We have tried everything to find out what it is, we know it was from Nesco as it is branded on the back but there is almost nothing about it anywhere on the internet. I found one lead that showed that it was a salesman's warming oven and we know it is not electric; but either way it has become my newest treasure! I can't wait to show you what I'm going to turn it into! Stay tuned for the post production this weekend!! =)
yah Photography
DIY - Vintage Lace Pen Jar /
THE pod - Review with Photos /

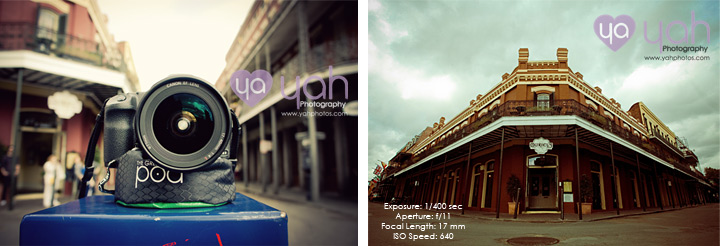
The Story: During our trip to NYC in December I knew that I wanted to get a night shot of the city from the top of a building, and a couple other shots that required a tripod. Once we landed, our first stop was B&H Photo! We went straight to the tripods, found the one we had been looking at online and purchased it. While walking to the register we noticed a display rack for THE pod. My husband had seen it online and had told me about it and we had done a little research on it so we decided to get the green pod and try it out. Well, it was a good thing we did. Later that night, we get to the top of Rockefeller Center and I start to put my tripod up and a security guard tells me that I am not allowed to have a tripod up there. I was so bummed and thought man the rest of the trip is going to stink because I couldn’t use my tripod. But lucky for us, we had grabbed that pod. It made its debut in Grand Central Station, and WOW was it awesome! It is so easy to connect to the camera; you just screw it into the tripod mount and then clip a strap around the lens to keep it in place. Any sort of semi-flat surface will hold the Pod, as it has beans or something similar that stabilizes the camera to hold steady while taking a photograph. I tried out a variety of shutter speed lengths to see just how stable the Pod was, and was impressed by the results. Below are pictures with the camera settings so you can see for yourself...
And here it is on top of the Empire State Building… remember I am 86 stories up and the building sways back and forth; so any sort of zoom lens would show some shake without a tripod, or in my case THE pod =)
Then just this past weekend in New Orleans, I took it everywhere with me and these are the shots I got!
Imaging USA 2012 Trip to New Orleans /
Featured in the Paper!! /

When nominated in September, Conley believed there was no way she would win, since she was up against the best photographers in Fort Mill. “It is a great achievement for me, especially with the amazing year we have had,” she said. During 2011, Conley undertook the 365 Project. She took a photograph every day, documenting the year in pictures. She posted the pictures nightly on her blog and on Facebook for all her fans to see. The task seemed daunting in the beginning of 2011, but coming up on day 365, she could not believe how fast the year had actually gone by. Many of Conley’s photos were taken in the Fort Mill area, including downtown Fort Mill, Baxter Village, Anne Springs Close Greenway and other locations. Others were taken in Indian Land on Henry Harris Road, Possum Hollow Road and in downtown Lancaster, including a photo of the historic Lancaster County courthouse that she snapped while on a tour there with the Indian Land Rotary Club. With this project behind her, Conley said she is looking forward to 2012 and the opportunities that 2011 opened up for her. She has been a photographer since 2004, but started Yah Photography in 2010. Yah stands for “young at heart.” “The name came about because I always want to have a child-like sense of creativity and love of life,” Conley said. She says this quote from Chris Hughes sums it up perfectly: “For better or worse, I never let go of the uninhibited feeling a child has when they imagine and create.” Conley lives in Indian Land with her husband, Robbie, and two dogs, Brody and Blitz. When she is not taking photographs, she works as a relationship banker at the Indian Land BB&T. Conley is booking weddings and portrait sessions for the spring and fall of 2012. Visit her webpage, www.yahphotos.com, where you can access her blog and Facebook page to see her 365 Project photos and her Best of 2011 award.


