Creative

Unveiling - Vintage Charging Station by Kelli Conley

After applying three coats of sealing rubber inside, and a couple coats of yellow paint outside, a bit of distressing... and VOILA'!!
When we went to The Depot we were on a quest to create this... but then found this little gem (for those of you who did not see the before pictures).  I am so happy we did, because it turned out better than I imagined!  So now my charging station is all ready to go, rainbow fan and everything!
 
Stay tuned for my next project... a vintage lace camera strap cover!! I've been waiting awhile for this one!!  
 

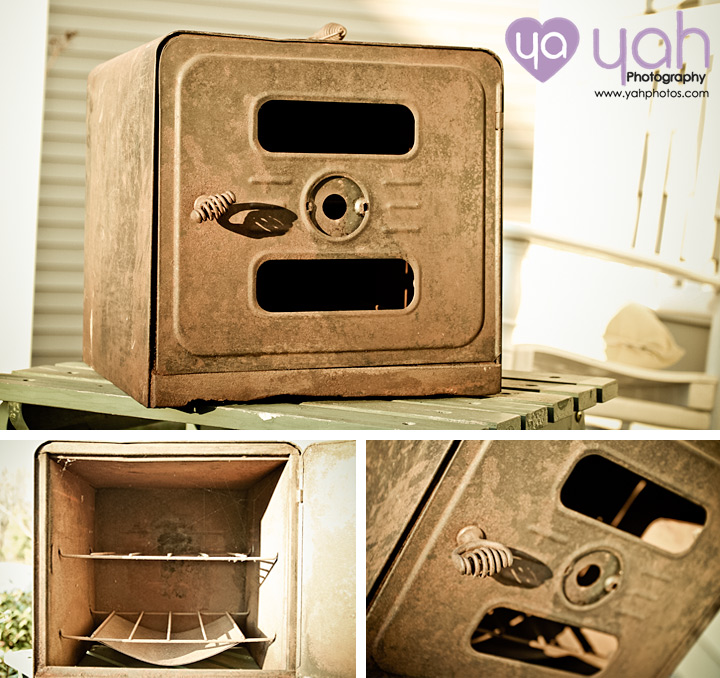
Discovered - Vintage Salesman's Warming Oven by Kelli Conley

So excited for what we uncovered at The Depot this past weekend! We have tried everything to find out what it is, we know it was from Nesco as it is branded on the back but there is almost nothing about it anywhere on the internet. I found one lead that showed that it was a salesman's warming oven and we know it is not electric; but either way it has become my newest treasure! I can't wait to show you what I'm going to turn it into! Stay tuned for the post production this weekend!! =)


DIY - Vintage Lace Pen Jar by Kelli Conley

This all started with a jar I had lying around the house. I thought, what can I do with this... make it into a pen jar! 
It was super easy and turned out really cute!
Here are all the supplies I used, you can add more and change to your liking:
A smaller size Ball or other glass jar, paper to line the jar, vintage lace to go around the jar, a paper flower, a small square of cardstock, sticker letters, stamp pad, hot glue gun, scissors, paper cutter...
Step One: Measure the inside of the jar, and cut the lining paper to match that height. Once it is cut you can either let the piece wrap within itself inside the jar, or you can trim it to the circumference of the jar.  (I just let mine wrap around the inside of the jar)
Step Two: Wrap the vintage lace around the jar and cut where it touches.
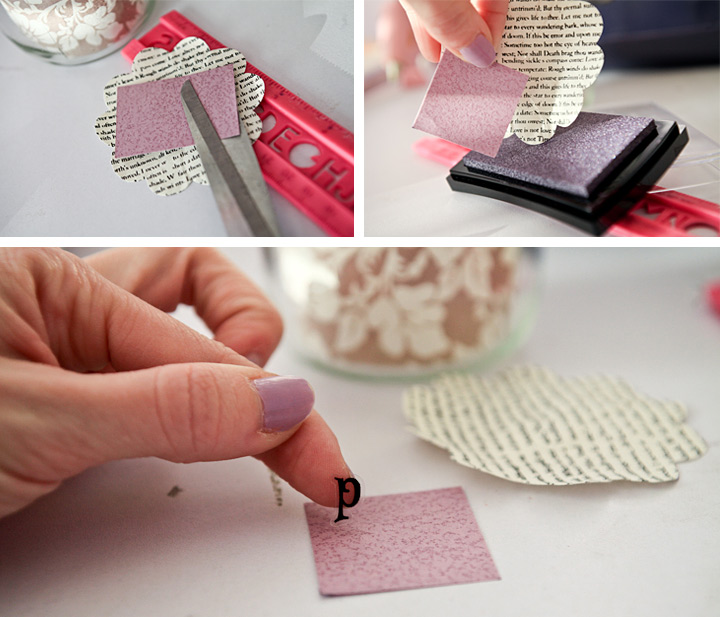
Step Three: Cut your small piece of card stock to match the inside of your paper flower, make sure you make it large enough to fit your sticker letters
Step Four: I like the ink the edges of my paper, it kind of gives it a distressed look.
Step Five: Then work to attach your letters, make sure you watch your spacing... I always lay them lightly to make sure they are aligned before I completely stick them down.
Step Six: Glue down the square card stock you just put the letters on, onto the paper flower
Step Seven: Glue the vintage lace you cut onto the back of the paper flower, make sure both piece touch as that is how you measured it when you cut it. 
Then slip the whole thing over the bottom of the jar and insert pens! This is so customize-able, I just love it! Hope this inspired you to get out and do something crafty!! 
I hope this inspired you to get out and do something crafty!! 
 

Getting Inspired! by Kelli Conley

Trying out a color palette for our website redesign
We are hoping to roll it out sometime in late February so be on the lookout! ................................................................................................................................................................................................................................ ................................................................................................................................................................................................................................ ................................................................................................................................................................................................................................

Day 334: DIY Zipper Pouch - For Mirrorless Camera's by Kelli Conley

D334:
So story of my life, we got this camera with money from Christmas last year, bought the fabric to make it in July and finally had a chance to sew it two months ago, and just now getting to take a picture of it! But that aside, I realized once we bought the Sony NEX that there was no case for it in the US that I could find that would fit this camera shape, due to the lens. (Now that Nikon, Pentax, and others have come out with some similar camera's there is probably one out that I can buy, but oh well I wanted to make my own). So I went on a mission to find a burlap type fabric that I could add a purple lining too and make it my own. I then found a tutorial on youtube and sewed my little heart out until it was done. Then vuala I had the perfect pouch for my camera! Too bad it took me almost a year... the poor thing has gone through a beating the rest of the year without something protecting it! =/
 

Like us on Facebook! Click Here